Ever wondered why your indoor lavender plants look more like a mini desert than thriving purple splendor? Enter How To Grow Lavender Plants Indoors Like a Pro, your ultimate green-thumb GPS! Our foolproof guide reveals the secrets of indoor lavender mastery, from light trickery to soil sorcery and precise watering schedules. Forget stumbling in the dark and let’s get those fragrant blooms to rival your wildest Pinterest dreams without ever stepping outside! Intrigued? So are we—let’s dive into this purple paradise together.
Key Takeaways
- Learn how to create a cozy indoor space for your lavender, even if your thumb’s more brown than green.
- Discover the perfect lighting conditions that mimic the sunny Mediterranean – your lavender’s happy place.
- Get the dirt on soil requirements: not all soil is created equal when it comes to lavender!
- Watering tips: Hydration is key, but don’t turn your lavender into a soggy mess.
- Boost your indoor garden with fragrant purple blooms, no backyard necessary.
- Say goodbye to outdoor-only lavender myths – you can totally do this indoors!
- Explore how to keep those purple blooms thriving all year round with our schedule hacks.
Why Indoor Lavender Growing Is Totally Achievable for Everyone
Look, we get it. You’ve probably walked past a lavender plant at the garden center and thought, “That’s beautiful, but I live in an apartment” or “I don’t have a yard.” Here’s the thing though—growing lavender plants indoors is absolutely doable, and you don’t need to be some botanical genius to pull it off. In fact, with the right approach to light, soil, and watering schedules, you can have thriving purple blooms right in your living room. This guide walks you through everything you need to know to grow lavender plants indoors like a pro, whether you’re a total beginner or someone who’s killed a few succulents (no judgment here).
- Indoor lavender growing has exploded in popularity because it brings the calming scent and beauty of lavender into homes year-round, regardless of climate.
- The key to success lies in understanding that lavender plants thrive in specific conditions—mimicking their native Mediterranean environment is essential.
- You don’t need fancy equipment or a greenhouse; a sunny windowsill and the right soil mix can set you up for gorgeous blooms.
- According to recent horticultural studies, indoor lavender growers report higher success rates when they focus on drainage and light quality above all else.
- The beauty of growing lavender plants indoors is that you control every variable, eliminating outdoor pests and weather unpredictability.
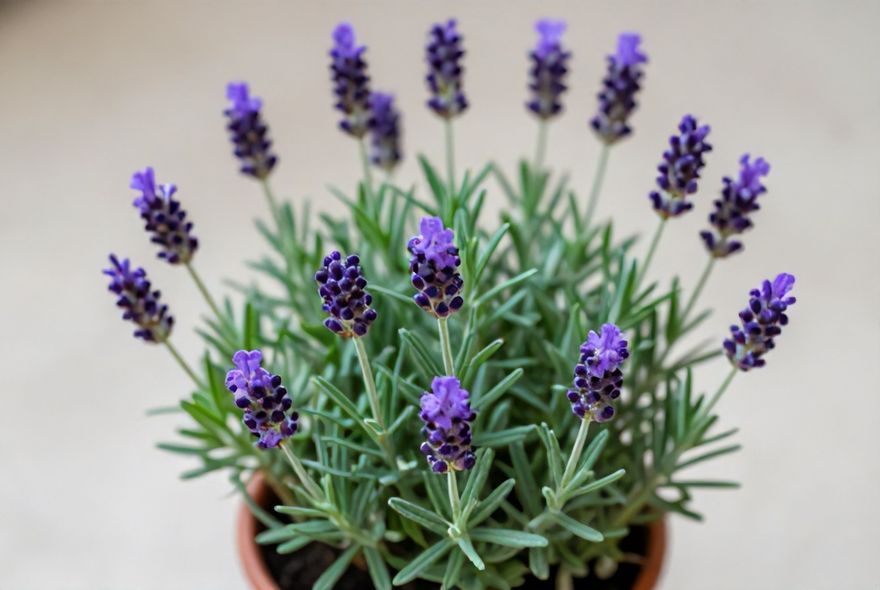
Choosing the Right Lavender Varieties for Indoor Spaces
Not all lavender plants are created equal when it comes to indoor growing. You know that feeling when you pick the wrong variety and it just doesn’t work? Yeah, we want to save you from that. The good news is that certain lavender varieties absolutely flourish indoors, while others need more outdoor space. Understanding which varieties work best for your indoor setup is step one of growing lavender plants that actually thrive. Think of it like matching a roommate—you need the right fit.
- English Lavender (Lavandula angustifolia) is the MVP of indoor lavender growing—it’s compact, adapts well to containers, and produces those gorgeous purple blooms consistently.
- French Lavender (Lavandula stoechas) is another stellar choice, known for its distinctive pom-pom flower heads and slightly bushier growth pattern that works great in pots.
- Spanish Lavender (Lavandula stoechas subsp. pedunculata) thrives indoors if you can provide bright light, making it perfect for south-facing windows.
- Dwarf varieties like ‘Munstead’ and ‘Hidcote’ are absolute game-changers for indoor lavender growing because they stay compact and don’t require extensive pruning.
- Avoid planting lavender plants that are too large or vigorous for containers, as they’ll outgrow your space and become leggy or stressed.
Mastering Light Requirements for Thriving Lavender Plants
Here’s where most people stumble with indoor lavender growing—light. Lavender plants are sun-worshippers. We’re talking serious sunlight requirements. You can’t just plop your lavender in a corner and hope for the best. If you want those purple blooms to flourish, you’ve got to get serious about light quality and duration. This is honestly the make-or-break factor when you’re learning how to grow lavender plants indoors.
- Lavender plants need a minimum of 6-8 hours of direct sunlight daily; ideally, aim for 12-14 hours during growing season for optimal blooming and color intensity.
- South-facing or west-facing windows are your best bet for indoor lavender growing—they provide the consistent, intense light that lavender plants absolutely crave.
- If your home doesn’t get enough natural light, consider investing in a grow light system; full-spectrum LED grow lights positioned 6-12 inches above your lavender plants work wonderfully.
- Rotating your lavender plants weekly ensures even light exposure on all sides, preventing the lopsided growth that happens when plants only receive light from one direction.
- During winter months, when daylight decreases, supplementing with artificial light becomes crucial for maintaining healthy lavender plants and preventing dormancy-related decline.
Getting Your Soil Mix Right for Indoor Lavender Success
You know what separates successful indoor lavender growing from the frustrating failures? Soil. And not just any soil—the right soil. Lavender plants have a reputation for being picky about drainage, and honestly, that reputation is earned. If you’re using regular potting soil, you’re probably setting yourself up for root rot. Let’s talk about creating the perfect soil environment for your lavender plants to absolutely thrive.
- Lavender plants despise waterlogged conditions, so your soil mix must be incredibly well-draining; combine regular potting soil with perlite or coarse sand in a 2:1 ratio for optimal drainage.
- Adding limestone or horticultural grit to your lavender soil mix improves drainage even further and mimics the slightly alkaline conditions these plants prefer naturally.
- Your lavender plants will appreciate a pH level between 6.5 and 7.5; if you’re unsure about your soil’s pH, grab an inexpensive soil testing kit to check.
- Never use moisture-retentive potting mixes that are designed for tropical plants—these are the enemy of indoor lavender growing and will cause root problems.
- Refresh your lavender plants’ soil annually by removing the top inch and replacing it with fresh, well-draining mix; this prevents nutrient depletion and maintains excellent drainage.
Establishing the Perfect Watering Schedule for Indoor Lavender Plants
This is where we need to have a real talk about watering your indoor lavender growing setup. The biggest mistake people make? Overwatering. It’s the kiss of death for lavender plants. We all want to nurture our plants, and that instinct tells us to water frequently. But lavender plants are Mediterranean natives—they’re adapted to dry conditions. Once you nail your watering schedule, you’re basically golden with indoor lavender growing.
- Water your lavender plants thoroughly but infrequently; allow the soil to dry out completely between waterings, typically every 10-14 days depending on humidity and pot size.
- The “finger test” is your best friend—stick your finger about an inch into the soil around your lavender plants; if it feels dry, water; if it’s moist, wait another few days.
- During growing season (spring and summer), your lavender plants will need more frequent watering, but still maintain that “dry between waterings” principle for healthy growth.
- In winter, reduce watering significantly for your indoor lavender growing setup—your plants enter a semi-dormant state and need far less moisture than you’d expect.
- Always water at the soil level, avoiding wetting the foliage of your lavender plants; this reduces disease risk and prevents fungal issues that thrive in humid conditions.
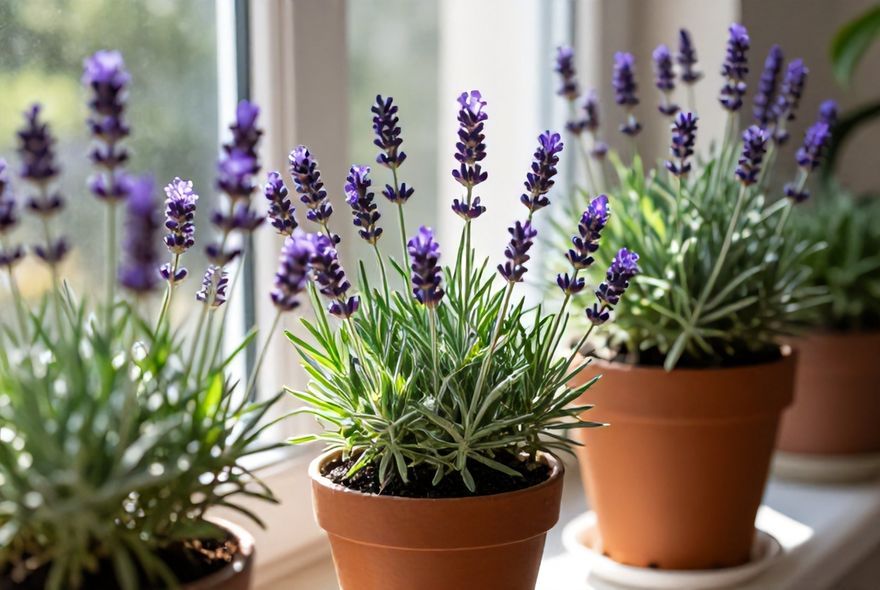
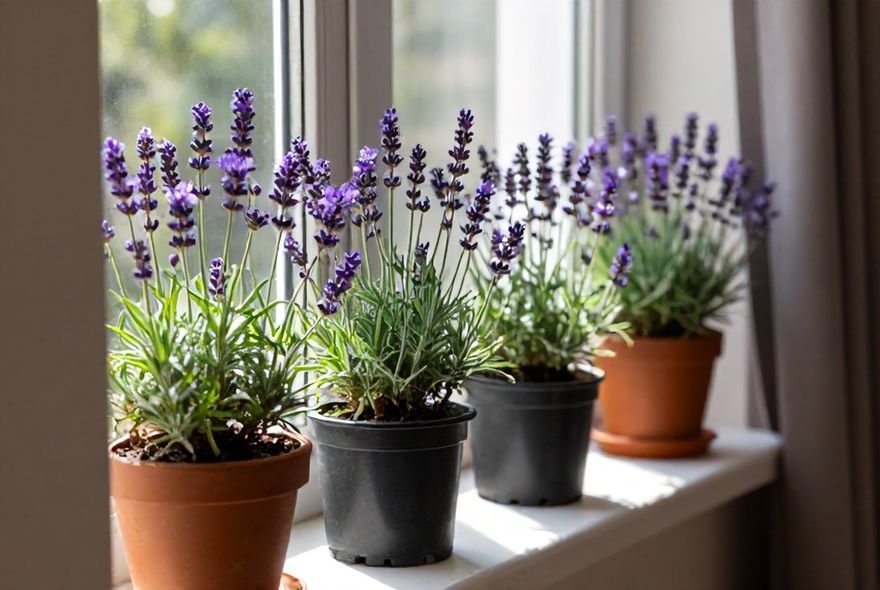
Container Selection and Drainage: The Foundation of Indoor Lavender Growing
You might think choosing a pot for your indoor lavender growing is straightforward, but there’s actually more nuance here than you’d expect. The container you select directly impacts how your lavender plants grow, how often you’ll need to water, and whether you’ll deal with root rot. We want you to get this right because the right pot is honestly half the battle when it comes to growing lavender plants indoors successfully.
- Select pots with drainage holes—this is non-negotiable for indoor lavender growing; without drainage, water pools at the bottom and your lavender plants suffer root rot almost immediately.
- Terracotta pots are excellent for lavender plants because they’re porous and allow soil to dry out faster, which aligns perfectly with what these plants prefer during indoor growing.
- Choose a container that’s proportional to your lavender plants’ size—typically 6-8 inches in diameter for smaller varieties; overcrowding or undersizing affects growth and water retention.
- If you’re using a decorative pot without drainage holes, place a smaller drainage pot inside it rather than repotting directly; this simple trick prevents the common pitfall of killing lavender plants with poor drainage.
- Ensure your pot has multiple drainage holes rather than just one; this guarantees that water drains evenly and prevents pooling in corners of your indoor lavender growing setup.
Temperature, Humidity, and Air Circulation for Healthy Indoor Lavender Plants
Alright, so you’ve got the light figured out, the soil dialed in, and your watering schedule on lock. But there’s another layer to indoor lavender growing that a lot of people overlook—the broader environment. Temperature, humidity, and air circulation create the atmosphere where your lavender plants either flourish or struggle. Getting these conditions right is what separates amateur indoor lavender growing from the pro setup you’re aiming for.
- Lavender plants prefer cooler temperatures, ideally between 60-70°F during the day and slightly cooler at night; keep your indoor lavender growing space away from heat sources like radiators or vents.
- These plants don’t like excessive humidity; aim for humidity levels around 30-40%; if your home is more humid, improve air circulation with a small fan to prevent fungal issues.
- Good air circulation is absolutely crucial for indoor lavender growing; stagnant air promotes powdery mildew and other fungal diseases that can devastate your plants.
- Avoid placing your lavender plants near cold drafts or in rooms with temperature fluctuations; consistency matters more than perfection when you’re growing lavender plants indoors.
- During winter when indoor heating dries out the air, position your lavender plants away from heaters and consider placing a small humidifier in the room to maintain appropriate moisture levels.
Feeding Your Indoor Lavender Plants: Fertilizing for Gorgeous Blooms
You know that moment when your lavender plants are looking decent but the blooms seem a bit underwhelming? That’s often a sign that they need some nutritional support. Here’s the thing though—lavender plants don’t need heavy feeding. In fact, too much fertilizer can actually work against you. But strategic, light feeding helps your indoor lavender growing efforts produce those stunning purple blooms that make the whole endeavor worthwhile.
- Apply a balanced, slow-release fertilizer during the growing season (spring and early summer) at half strength; lavender plants prefer lean conditions and don’t need aggressive feeding.
- Organic options like fish emulsion or diluted seaweed solution work beautifully for indoor lavender growing and provide trace minerals your plants appreciate.
- Feed your lavender plants every 4-6 weeks during growing season, but skip feeding entirely during fall and winter when these plants naturally slow their growth.
- Avoid high-nitrogen fertilizers for your indoor lavender growing setup; nitrogen promotes leafy growth at the expense of blooms, which is the opposite of what you want.
- If your lavender plants show signs of nutrient deficiency (yellowing leaves, poor growth), a light application of balanced fertilizer usually corrects the issue within a few weeks.
Pruning and Maintenance Techniques for Compact, Blooming Lavender Plants
Pruning your indoor lavender growing specimens might seem intimidating, but it’s actually one of the most rewarding parts of the process. Regular pruning keeps your lavender plants compact, encourages bushier growth, and promotes more abundant blooming. Think of it like giving your plants a little spa day—they come out looking better and feeling healthier. Once you understand the basics of pruning lavender plants indoors, you’ll wonder why you ever hesitated.
- Prune your lavender plants in early spring before new growth emerges; remove about one-third of the plant’s height to encourage bushiness and prevent legginess.
- Deadhead spent flowers throughout the blooming season on your indoor lavender growing plants; this simple practice redirects energy into producing more blooms rather than seed production.
- Avoid cutting into old woody growth when pruning your lavender plants; always prune into the green, leafy portions to prevent dieback and maintain plant health.
- Light pruning after blooming (late summer) helps shape your indoor lavender growing specimens and removes any damaged or diseased growth before the dormant season.
- Use sharp, sterile pruning tools when working with your lavender plants; clean cuts heal faster and reduce the risk of disease spreading through your indoor growing setup.
Troubleshooting Common Issues in Indoor Lavender Growing
Real talk—sometimes things go sideways with indoor lavender growing, and that’s completely normal. The difference between pros and beginners isn’t that pros never encounter problems; it’s that they know how to identify and fix them quickly. Whether your lavender plants are looking droopy, developing spots, or refusing to bloom, there’s usually a simple solution. Let’s walk through the most common issues you might face and how to tackle them like a seasoned grower.
- Root rot (the most common killer of indoor lavender plants) shows up as drooping, mushy stems and a foul smell from the soil; fix it by repotting into fresh, dry soil and reducing watering frequency immediately.
- Powdery mildew appears as a white coating on leaves; prevent it by improving air circulation with a fan and reducing humidity around your lavender plants.
- Leggy growth (tall, sparse plants with few leaves) indicates insufficient light; move your indoor lavender growing setup closer to a window or invest in a grow light.
- Yellow leaves often signal overwatering or nutrient issues; check your watering schedule first, then consider a light feeding if the plant’s growth seems stunted.
- Lack of blooms despite healthy foliage usually means insufficient light or too much nitrogen fertilizer; adjust your lighting situation and switch to a more balanced or phosphorus-rich fertilizer.
Propagating Your Indoor Lavender Plants: Growing Your Collection
Once you’ve mastered indoor lavender growing and have a thriving plant or two, you might want to expand your collection without buying new plants. Here’s the exciting part—propagating lavender is totally doable and honestly kind of addictive. You’ll find yourself with lavender plants for every windowsill in your house, plus extras to gift to friends. It’s one of the most satisfying aspects of indoor lavender growing, and we’re here to walk you through it.
- Propagate from cuttings in late spring or early summer; take 2-3 inch cuttings from new, green growth on your healthy lavender plants.
- Use well-draining propagation mix (perlite and peat moss in equal parts) for your cuttings; regular potting soil retains too much moisture and causes rot during the propagation phase.
- Dip cuttings in rooting hormone before planting—this dramatically increases success rates when propagating lavender plants indoors.
- Place your propagating lavender cuttings in bright, indirect light and maintain consistent (but not wet) moisture; roots typically develop within 2-3 weeks.
- Once rooted, gradually acclimate your new lavender plants to brighter light and normal watering schedules, then pot them into regular soil once they’ve established a healthy root system.
Growing lavender plants indoors is genuinely one of the most rewarding horticultural experiences you can have. You don’t need a green thumb, you don’t need outdoor space, and you definitely don’t need to be a plant expert. What you need is understanding—understanding how to provide the right light, the perfect soil, appropriate watering, and an environment where these beautiful Mediterranean natives can thrive. Start with this guide, pick up a single lavender plant, and watch what happens. Before you know it, you’ll be the person everyone asks for lavender growing tips, and your home will smell absolutely incredible. For more detailed information on indoor lavender cultivation techniques, check out comprehensive resources that dive even deeper into these methods.
Growing lavender indoors shouldn’t be a horticultural mystery. With our foolproof guide, you’ll have a thriving mini-garden of aromatic purple blooms without needing a green thumb or sacrificing precious outdoor space. Remember, light is your lavender’s best friend, so give your plants the sunniest spot in your home. A well-draining soil is like a comfy pair of slippers for your lavender, keeping roots cozy and dry. And don’t overwater—lavender prefers a slightly parched lifestyle. By focusing on these essentials, you’ll master indoor lavender growing like a pro.
Now that you’re equipped with all the secrets to indoor lavender bliss, why not share your newfound expertise? Whether you’re into social snaps or keen on gardening groups, let the world see your blooming success! Show off your vibrant lavender plants on Facebook, or captivate your Instagram followers with those lush purples gracing your windowsill. Who wouldn’t want an audience for their horticultural triumph? Besides, sharing’s caring, right?


Leave a Reply