Ever stared at a tiny paint sample and wondered if your dream of a lively green wall is about to transform your living room into an eerie forest dungeon? Don’t worry, you’re not alone! Our blog, Checklist: Painting Walls Green Without Making Them Cave-Like, is here to save the day. We’re unboxing the secrets of the green spectrum with a foolproof checklist that’ll ensure your spaces feel energizing, not entrapping. Experts agree—when it comes to greens, there’s a fine line between fresh and a whimsical wooded cave. Ready to dive in?
Key Takeaways
- Find the perfect green shade that won’t make your room feel like a forest dungeon.
- Explore the green spectrum without feeling overwhelmed.
- Use lighting tricks to keep your green walls fresh and lively.
- Choose complementary decor to enhance your new green space.
- Stay away from deep greens in low-light areas to avoid a cave-like vibe.
- Test paint samples in different lighting conditions before committing.
- Mix textures and patterns to balance out the green hue.
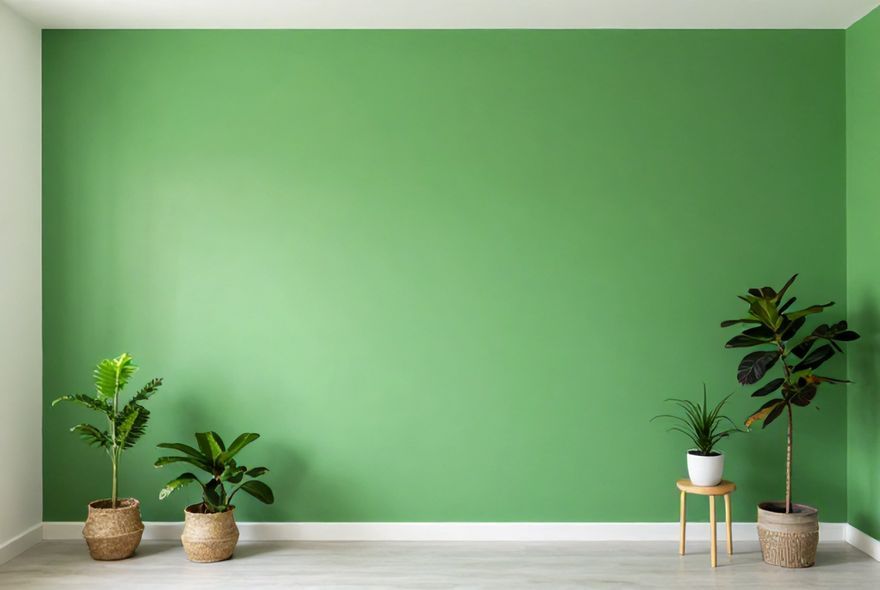
Why Green Walls Are Having a Moment (But You Need a Game Plan)
Look, green walls are everywhere right now—and honestly, there’s a reason for that. There’s something about bringing a bit of nature indoors that just hits different, you know? Whether it’s sage, emerald, olive, or mint, green has this magical ability to make a space feel calming and sophisticated at the same time. But here’s the catch: one wrong shade choice, and suddenly your bedroom looks like you’re living inside a cave (no judgment—caves are cool, just not as bedrooms). The green spectrum is wildly overwhelming, and picking the right one requires more than just vibes and hope. That’s where a foolproof checklist comes in. This guide walks you through navigating the overwhelming green spectrum to ensure your walls feel fresh, inviting, and absolutely *not* dungeon-like. Because let’s be real—you’re about to invest time and money into this, so we’re doing it right.
- Green’s Psychological Impact: Colors in the green family are proven to reduce stress and create a sense of balance. Research shows that green promotes relaxation and mental clarity—way better than that cave-dungeon vibe you’re trying to avoid.
- The Shade Spectrum Challenge: From pale pistachio to deep forest, green has hundreds of variations. The difference between “fresh and modern” and “gloomy and enclosed” often comes down to undertones and lighting conditions.
- Lighting Changes Everything: A green that looks gorgeous at the paint store might transform completely in your home depending on natural light, artificial lighting, and time of day. This is why so many people end up with walls they regret.
- The Checklist Advantage: Following a systematic approach eliminates guesswork. A foolproof checklist ensures you’ve considered undertones, lighting, finish, and complementary colors before committing to that gallon of paint.
- Why This Matters: Painting walls is a commitment. Unlike swapping throw pillows, a paint job requires effort, time, and money. Getting it right the first time saves you from costly repaints and that sinking feeling of buyer’s remorse.
Step 1: Assess Your Lighting Situation (This Is Non-Negotiable)
Before you even *think* about picking a green, you’ve got to understand your room’s lighting. Seriously, this is step one for a reason. Natural light is the wild card here—it changes throughout the day, shifts seasonally, and honestly, it’s basically the stage lighting for your walls. A north-facing room with minimal windows? That’s going to make cool-toned greens look darker and more muted. A south-facing room flooded with sunlight? That same green might feel too bright and washed out. And then there’s artificial lighting, which adds another layer of complexity. Warm bulbs make greens look more yellow, while cool bulbs can push them toward blue. Let’s break this down so you don’t end up with cave-like walls.
- Identify Your Light Direction: North-facing rooms get consistent, cool light. East-facing gets bright morning light. West-facing gets warm afternoon sun. South-facing (in the Northern Hemisphere) gets the most intense light. Each direction interacts differently with green undertones, so understanding your room’s orientation is the foundation of avoiding a gloomy result.
- Check Artificial Lighting: Walk around your room at different times—morning, afternoon, evening. Notice what bulbs you’re using (warm white, cool white, daylight). Take photos in different lighting conditions. This might sound excessive, but it’s the difference between a paint choice you’ll love and one that haunts you.
- Natural Light Intensity Matters: A room with tons of windows can handle deeper, richer greens without feeling dark. A room with one small window? You’ll want to lean toward lighter, brighter greens to keep things from feeling cave-like and enclosed.
- Seasonal Shifts: If you’re painting in winter with lots of artificial light, remember that spring and summer will bring more natural light. Choose a green that’ll feel fresh in both scenarios—not too dark for summer brightness, not too pale for winter gloom.
- Test Before Committing: Buy sample pots of paint and apply them to your walls in different spots. Live with them for a few days, observing how they look at different times. This is the ultimate reality check before you break out the roller.
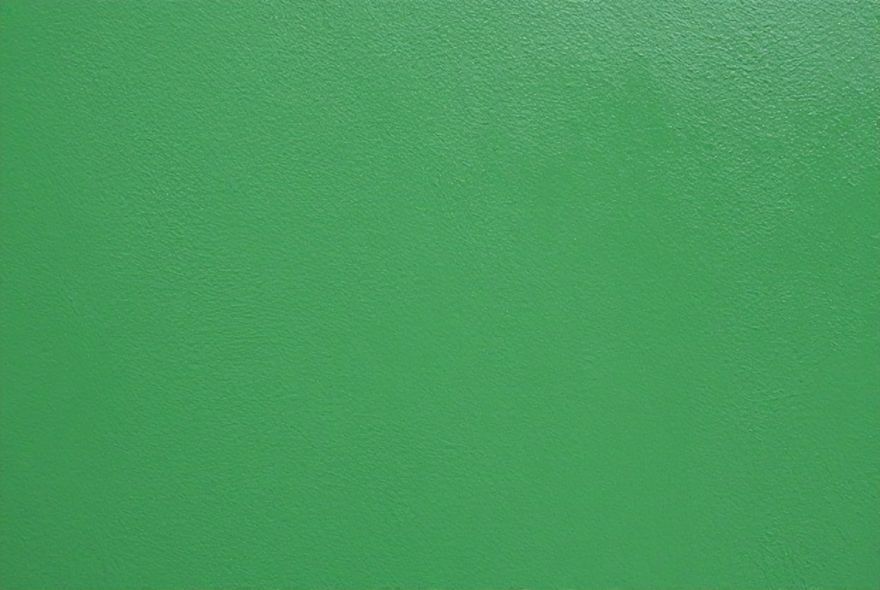
Step 2: Understanding Green Undertones (The Secret Sauce)
Here’s something most people miss: not all greens are created equal. Even two paints that look “green” can feel completely different because of their undertones. Some greens lean toward yellow, creating a warm, earthy vibe. Others lean toward blue, giving off cool, sophisticated energy. Then there are greens with gray undertones—these are the chameleons of the green world, adapting to their surroundings in ways that feel either fresh or, yes, slightly dungeon-adjacent. Understanding undertones is absolutely crucial to navigating the overwhelming green spectrum and nailing the look you want. Think of undertones as the personality of the color—they determine whether your walls whisper “cozy cottage” or scream “forest cave.”
- Warm Greens (Yellow Undertones): Sage, olive, pistachio, and khaki greens have yellow undertones. They feel earthy, warm, and inviting—think botanical gardens and nature lodges. These work beautifully in rooms with cooler lighting because they add warmth without feeling dark. They’re your go-to if you want fresh without gloomy.
- Cool Greens (Blue Undertones): Emerald, seafoam, teal, and eucalyptus greens lean blue. They’re sophisticated and calming but can feel cold or, in deeper shades, cave-like if you’re not careful. These shine in rooms with warm artificial lighting to balance them out. Pair them with warm wood tones to keep things feeling cozy.
- Gray-Based Greens (Neutral Undertones): Colors like dusty green, muted celadon, and charcoal-green have gray undertones. These are the Goldilocks of greens—they’re sophisticated, versatile, and less likely to feel overwhelming. They work in almost any lighting situation, making them ideal if you’re nervous about the whole cave-dungeon thing.
- The Undertone Test: Hold paint samples next to white paper. The undertone becomes more obvious in comparison. Also, check how the green looks next to your furniture, flooring, and existing décor. Undertones should complement your space, not clash with it.
- Avoiding the Dungeon Look: Deep greens with gray or blue undertones in poorly lit rooms are the usual culprits for that cave-like feeling. If you’re drawn to deeper greens, ensure your room has solid lighting and consider using them as an accent wall rather than all four walls.
Step 3: Consider Your Room’s Purpose and Vibe
You know what’s wild? The same green that’s absolutely perfect for a meditation room might feel totally wrong in a home office. That’s because different spaces call for different energy levels. A bedroom wants calming and restorative. A kitchen wants fresh and energizing. A living room wants balanced and inviting. Before you commit to a specific shade, think about what you want the room to *do* for you and the people spending time there. This is where your checklist gets personal—because the best green is the one that matches your lifestyle, not just your Pinterest board. Let’s talk about how to pick a green that actually serves your space.
- Bedrooms and Relaxation Spaces: Softer, lighter greens work best here. Sage, soft eucalyptus, and pale mint create a serene, spa-like atmosphere without feeling dark or overwhelming. You want to wake up feeling refreshed, not like you’re emerging from a forest. Warmer undertones (yellowy greens) add comfort; cooler ones (bluish greens) add sophistication.
- Home Offices and Creative Spaces: Medium-toned greens boost focus and creativity without being distracting. Think muted celadon, soft olive, or balanced forest green. These keep your brain engaged and calm—perfect for productivity. Avoid very dark or very pale greens, which can feel either oppressive or too washed out when you’re trying to concentrate.
- Living Rooms and Social Spaces: Go slightly richer here. A medium-to-deeper green (still avoiding cave-dungeon territory) works beautifully because it feels inviting and sophisticated. Pair it with warm lighting and you’ve got a space that feels both energizing and comfortable. This is where you can be a bit bolder without regret.
- Kitchens and Bathrooms: Brighter, fresher greens are your friends. Crisp, lighter shades (like mint or pale sage) make these spaces feel clean and lively. These rooms benefit from the energizing quality of lighter greens, and they’re less likely to feel dark or enclosed because bathrooms and kitchens tend to have smaller wall space.
- Accent Walls vs. Full Room: Painting all four walls in a deep, rich green requires confidence and good lighting. If you’re nervous about the cave-dungeon thing, start with one accent wall or go lighter overall. There’s zero shame in playing it safe—your happiness in the space matters way more than Pinterest perfection.
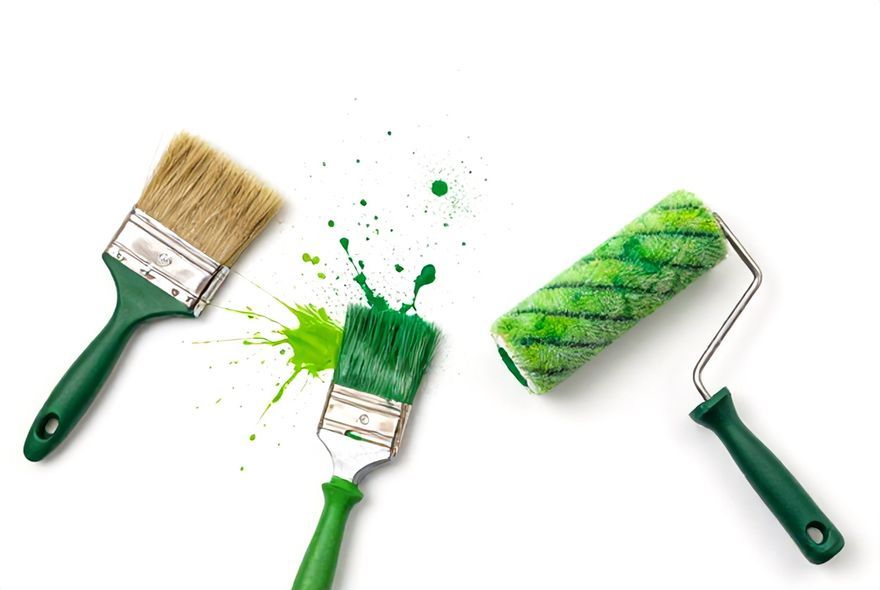
Step 4: Test Your Samples Like Your Life Depends On It
Listen, I know buying multiple paint samples feels like overkill. You’re standing in the paint aisle thinking, “I’ll just pick one and see how it goes.” Please don’t do that. I’m begging you. The sample stage is where you prevent the most regrettable decisions. You need to actually live with these colors in your space—not in the store, not on your phone, but in *your* room with *your* lighting and *your* furniture. This is non-negotiable if you want to navigate the overwhelming green spectrum successfully and end up with walls that feel fresh, not forest-dungeon gloomy. Think of samples as a free trial before you commit thousands of pesos or dollars worth of paint and labor.
- Buy Multiple Samples: Get at least 3-5 samples in different green tones (light, medium, dark; warm, cool, neutral). Most paint stores sell small sample bottles for cheap. Apply them to your walls in different areas and observe over several days. The investment is minimal compared to repainting an entire room.
- Paint Large Swatches: Don’t just apply a tiny 2×2 inch swatch. Paint at least a 2×3 foot section so you can see how the color feels in context. Small swatches are deceptive—they don’t give you the full visual impact of what your walls will actually look like.
- Observe at Different Times: Check your samples in morning light, afternoon light, and artificial light. Take photos at different times of day. Watch how the color shifts and changes. If it looks good across all these conditions, you’re golden. If it looks gloomy at any point, cross it off your list.
- Compare Alongside Your Décor: Place your samples next to your furniture, flooring, artwork, and any other permanent fixtures. Colors don’t exist in a vacuum—they interact with everything around them. A green that looked fresh next to white drywall might clash with your warm wood furniture.
- Get Feedback (But Stay True to Yourself): Show your samples to people you trust, but remember: you’re the one living in this space. If you love a shade and everyone else thinks it’s too bold, that’s okay. Confidence in your choice matters way more than committee approval.
Step 5: Evaluate Finish and Sheen (Glossiness Matters)
Okay, here’s something people often overlook: the finish of your paint affects how the color appears. A matte finish absorbs light and makes colors look deeper and more sophisticated. A glossy finish reflects light and makes colors look brighter and more vibrant. This is especially important when you’re navigating the green spectrum because the same shade of green will look totally different depending on whether you choose matte, eggshell, satin, or semi-gloss. If you want to avoid that cave-like feeling, understanding how finish impacts your color choice is clutch. Let’s break down what each finish does and how it affects your green walls.
- Matte Finish: Absorbs light, making greens look richer and deeper. Perfect for accent walls or darker greens because it adds sophistication. However, it shows dust, fingerprints, and wear more easily. Great for low-traffic areas like bedrooms, but maybe skip it in kitchens and bathrooms. Matte can feel cave-like if you’re already dealing with limited lighting, so use with caution in darker rooms.
- Eggshell Finish: The sweet spot for most people. It has a subtle sheen that reflects just enough light to keep colors looking fresh without being shiny. It’s durable, easy to clean, and works beautifully with any green shade. If you’re unsure about finish, go eggshell. It’s versatile and forgiving.
- Satin Finish: More reflective than eggshell, making colors pop. Great for kitchens, bathrooms, and high-traffic areas because it’s super durable and wipeable. Satin can make lighter greens feel almost luminous and keeps deeper greens from feeling too heavy. Definitely a strong choice if you want to avoid any dungeon vibes.
- Semi-Gloss or Gloss: Highly reflective and super durable. These finishes are typically reserved for trim, doors, and accents rather than entire walls. They can make greens look brighter and more vibrant but might feel too shiny for wall applications in most homes. Skip these for full wall coverage unless you’re going for a very specific, bold aesthetic.
- The Finish-Color Connection: Darker greens benefit from matte finishes for sophistication. Lighter greens shine with satin finishes for a fresh, clean look. Medium greens are flexible—eggshell works beautifully across the board. Think about your room’s lighting and foot traffic when choosing, because finish and color work together to create your final result.
Step 6: Complementary Colors and Décor Strategy
Here’s the thing—your green walls don’t exist in isolation. They’re sharing space with furniture, artwork, flooring, and trim. The colors and materials around your green walls dramatically impact whether they feel fresh and inviting or dark and cave-like. You could pick the most beautiful green in the world, but if your furniture is dark and your trim is dingy, even the prettiest shade will feel gloomy. This is where your checklist becomes about the bigger picture. You’re not just picking a wall color; you’re creating a cohesive, intentional space. Let’s talk about how to coordinate your green walls with everything else.
- Trim and Ceiling Color: White or off-white trim and ceilings make green walls feel fresh and clean. If you paint your trim the same color as your walls (a monochromatic approach), the space can feel smaller and potentially more cave-like. To avoid this, keep your trim crisp and bright. If your ceilings are white, your green walls will automatically feel less heavy and oppressive.
- Furniture Pairing: Warm wood tones (oak, walnut, honey) complement most greens beautifully. Cool wood tones (ash, whitewashed) work with blue-undertone greens. If your furniture is dark, lighter greens prevent the room from feeling too heavy. If your furniture is light, you have more flexibility with medium and deeper greens. The key is contrast—you want your walls and furniture to complement each other, not compete.
- Flooring Considerations: Light flooring (light wood, light tile, light carpet) keeps green walls from feeling dark. Darker flooring can work but requires lighter green walls to maintain balance. Medium gray flooring is flexible with almost any green. Brown flooring (typical hardwood) pairs beautifully with warm-undertone greens like sage and olive.
- Accent Colors: Warm neutrals (cream, beige, warm gray) keep green walls feeling calm and grounded. Bright accents (coral, yellow, white) add energy and prevent greens from feeling too heavy. Avoid too many competing colors—let your green be the star and use accents to support it. This prevents visual chaos and keeps the room feeling intentional.
- Artwork and Décor: Botanical prints, nature photography, and natural materials (wood, woven textures) complement green walls perfectly. Metal accents (gold, brass, copper) add warmth; silver and chrome add cool sophistication. Choose décor that enhances your green rather than fighting it. This creates cohesion and ensures your walls feel like part of a thoughtfully designed space, not an accidental dungeon.
Step 7: The Final Checklist Before You Commit
You’ve done the research, tested the samples, considered the lighting and undertones, thought about your room’s purpose, and envisioned your décor strategy. Now comes the moment of truth—are you actually ready to commit? This final checklist is your last chance to catch any potential issues and ensure you’re moving forward with confidence. Before you buy that gallon of paint and schedule your painting session, walk through this one more time. It’s the difference between a paint job you’ll love for years and one you’ll regret within months. Let’s make sure everything aligns.
- Lighting Reality Check: Have you observed your chosen green sample in morning, afternoon, and evening light? Does it look fresh and inviting at all times? If it looks gloomy at any point, keep testing other options. Your lighting situation is the foundation—get this right, and everything else falls into place.
- Undertone Alignment: Does your chosen green’s undertone match your room’s vibe and lighting? Warm greens for cozy spaces and cool lighting; cool greens for sophisticated spaces and warm lighting. Neutral greens for flexibility. Make sure the undertone feels intentional, not accidental.
- Room Purpose Alignment: Does your green choice support what this room is meant to do? Calming greens for relaxation, energizing greens for productivity, balanced greens for social spaces. Your choice should enhance the room’s function, not work against it.
- Décor Compatibility: Have you checked your green sample against your furniture, flooring, trim, and permanent fixtures? Does it coordinate beautifully, or does it clash? Your walls should enhance your existing décor, not require a complete redesign.
- Confidence Level: Are you genuinely excited about this color, or are you settling? You should feel confident and happy about your choice—not nervous or uncertain. If you’re still having doubts, test more samples or explore other options. There’s no rush, and getting it right is worth the extra time.
Pro Tips for Painting Success and Long-Term Satisfaction
Alright, so you’ve navigated the overwhelming green spectrum, you’ve gone through the checklist, and you’re ready to actually paint your walls. But before you grab a roller, there are a few pro tips that’ll ensure your painting goes smoothly and your results are absolutely perfect. Painting technique matters, prep work matters, and knowing what to expect after you’re done matters. Let’s talk about the things that separate an amateur paint job from a professional-looking result. Because you’ve done all this work to choose the perfect green—you want the execution to match your vision.
- Prep Like Your Life Depends On It: Clean your walls thoroughly, patch any holes, sand rough spots, and prime if necessary. A good paint job starts with good prep. Dust, dirt, and imperfections will show through your beautiful green, so take this step seriously. It’s boring but absolutely worth it.
- Use Quality Paint and Tools: Cheap paint covers poorly and doesn’t last. Invest in decent paint—you’ll need fewer coats and the color will look richer. Quality brushes and rollers make application smoother and cleaner. This isn’t the place to cheap out.
- Apply Multiple Thin Coats: Two to three thin coats look better than one thick coat. Thin coats dry more evenly, show fewer brush marks, and provide better coverage. Patience here pays off in the final result.
- Consider Accent Walls If You’re Nervous: Painting one accent wall in your chosen green lets you live with the color at a lower commitment level. If you love it, you can always paint the other walls later. If it’s not quite right, you’ve only committed to one wall instead of four.
- Give It Time to Settle: Paint colors look slightly different for the first week or so after application. The finish settles, lighting changes, and your eye adjusts. Don’t panic if your green looks slightly different on day one than it did on the sample. Live with it for a full week before deciding if you want to make changes. You’ll likely fall in love with it once it’s properly settled.
Troubleshooting: What to Do If Your Green Goes Wrong
Okay, real talk—sometimes despite your best efforts, the green doesn’t work out. Maybe the lighting was different than you thought, or the color looked different on your walls than on the samples, or you just changed your mind. That’s okay. It happens to literally everyone. The good news? This checklist approach makes it easier to figure out what went wrong and how to fix it. Instead of assuming your whole room is doomed, you can troubleshoot systematically. Let’s talk about common green wall problems and how to solve them without losing your mind.
- It Looks Too Dark and Cave-Like: Your first move is to evaluate lighting. Add more light fixtures, use brighter bulbs, or keep window treatments minimal to maximize natural light. If lighting doesn’t fix it, you’re dealing with an undertone issue or a shade that’s too deep for your space. Consider painting trim brighter white, adding light furniture, and incorporating bright accents to balance the darkness. If it’s truly unbearable, you can always repaint with a lighter shade—you’re not stuck forever.
- It Looks Too Yellow or Too Blue: This is an undertone mismatch. If your warm-toned green feels too earthy or your cool-toned green feels too cold, it’s about surrounding it with complementary colors. Warm undertones pair with cool-toned furniture and accents; cool undertones pair with warm wood and golden accessories. Alternatively, you can repaint with a more neutral green that adapts to your space better.
- It Clashes With Your Existing Décor: This usually means the undertone doesn’t coordinate with your furniture or flooring. Quick fix: update some key pieces (throw pillows, artwork, a new area rug) to bridge the gap. Long-term fix: if it truly bothers you, repainting with a more compatible green might be worth the investment.
- It Looks Completely Different Than the Sample: This happens due to lighting differences or the sample being from a different batch. It’s frustrating but fixable. Get another sample of your chosen color and compare it to your walls. If there’s a significant difference, talk to the paint store—sometimes they can match it better. If not, you might need to try a different green that performs better in your specific space.
- You Just Don’t Love It Anymore: That’s valid. Sometimes we change our minds, and that’s okay. You have options: add vibrant accents and décor to make the space feel different, paint an accent wall in a complementary color to break things up, or bite the bullet and repaint. If you’re going to repaint, use everything you’ve learned from this experience to choose a green you genuinely love the second time around.
For more detailed guidance on green color selection and wall painting techniques, check out the comprehensive resource on green color design for additional insights and inspiration.
Conclusion
Choosing the right green for your walls doesn’t have to turn into a forest-dungeon disaster. First on your foolproof checklist is understanding the lighting in your space – natural light will play differently with those rich emeralds versus gentle sage hues. Secondly, consider the mood and function of the room. Lighter shades like mint or pistachio can make a space feel fresh and airy, while deeper tones might evoke a cozier, more contemplative atmosphere. Our comprehensive guide helps you navigate these choices, ensuring your walls are the verdant breath of fresh air they should be, aligning perfectly with the blog’s commitment to making your walls pop without veering into gloomy territory.
Now that you’re armed with all the tips and tricks to make your walls sing with the right shade of green, how about showing off your newfound knowledge? Snap a photo of your beautifully hued walls and tag us on Instagram or give us a shout-out on Facebook. We’re dying to see how you’ve navigated the overwhelming green spectrum and truly made it your own! And if you’re eager for more vibrant home tips, don’t forget to follow our social media for the latest updates. Happy painting!


Leave a Reply