Ever stared at those seamless video backdrops and wondered, ‘Is there a secret sauce?’ In ‘How To Create a Green Screen Background for Video Content,’ we’re diving into the mystical world of chroma key mastery. Whether you’re a budget-conscious filmmaker or a small-room warrior, you’ll learn how to build a green screen studio that’s slicker than a dolphin in a wetsuit. Goodbye, shadows and color spills—hello, professional polish! Based on insider insights and a pinch of wizardry, let’s transform your video content into something Oscar-worthy. Ready to up your game?
Key Takeaways
- Discover budget-friendly tips for setting up your green screen studio without breaking the bank.
- Learn how to use lighting to banish shadows and avoid that pesky color spill.
- Transform any space into a professional video studio with DIY tricks and tools.
- Lighting hacks that make your backdrop as smooth as a Hollywood blockbuster.
- Who knew creating video magic was this easy? Grab your green screen and let’s get started!
- Say goodbye to grainy videos and hello to polished content with these expert tips.
Why Green Screen Technology is a Game-Changer for Content Creators
Let’s be honest—not everyone has access to a fancy studio or the budget to travel to exotic locations for every video shoot. That’s where green screen technology becomes your secret weapon. Whether you’re a YouTuber, podcaster, or small business owner creating video content, knowing how to create a green screen background can literally transform your production quality without breaking the bank. The beauty of this technique is that it’s more accessible than ever, and you don’t need to be a Hollywood filmmaker to pull it off. With the right setup, some solid lighting tricks, and a bit of patience, you’ll be compositing professional-looking backgrounds faster than you can say “chroma key.”
- Cost-Effective Studio Setup: You can build a professional green screen studio for under $100 if you’re smart about your purchases and DIY approach. No need to rent expensive studio space when your garage or spare bedroom can become your creative hub.
- Versatility in Content Creation: Green screen technology opens doors to unlimited background possibilities—from virtual offices to exotic landscapes. This flexibility means you’re not limited by your physical location, which is crucial for consistent, professional video content.
- Eliminate Location Constraints: Bad weather? No problem. Don’t have the perfect room backdrop? Green screen’s got you covered. This technology frees you from geographical limitations and makes scheduling shoots way more convenient.
- Professional Appearance on Any Budget: According to resources discussing green screen best practices, proper lighting and setup can rival expensive production setups, making your amateur content look legitimately professional.
- Time-Saving in Post-Production: When you nail the green screen setup properly, your editing phase becomes significantly faster. Less color spill cleanup and shadow correction means more time actually creating content rather than fixing technical issues.
Understanding the Fundamentals of Green Screen Technology
Before you start shopping for materials, let’s get into the nitty-gritty of how green screen actually works. You know that moment when you see a weather reporter standing in front of a map that they’re clearly not actually standing in front of? That’s chroma keying in action, and it’s been around longer than you’d think. The technology is based on a pretty straightforward concept—you film someone against a solid color background (green is most common, though blue works too), and then during post-production, you use software to remove that color and replace it with whatever background you want. The reason green became the industry standard? Our eyes are more sensitive to variations in green, which means it gives editing software an easier time distinguishing between the subject and the background.
- Chroma Key Basics: The green screen background acts as a “key color” that editing software recognizes and removes. This works because green is rarely found in human skin tones, making it easier for software to distinguish between you and the background without accidentally deleting parts of your face or clothing.
- Why Green Over Blue: While blue screens work, green is preferred because it uses less of the color spectrum that overlaps with human skin tones. Plus, green fabric is cheaper and easier to find, which matters when you’re building on a budget.
- Color Spill Prevention: This is the sneaky problem that catches beginners off guard—when light bounces off your green screen, it can cast a greenish tint on your subject. Understanding this helps you set up lighting to minimize it from the start rather than spending hours fixing it in post.
- Shadow Control: Shadows on your green screen create dark areas that editing software struggles with. They can appear as weird outlines around your subject or create transparency issues. Proper lighting setup (which we’ll dive into) is your best friend here.
- Resolution and Detail: The cleaner your green screen footage, the easier your software has an easier time creating precise edges around your subject. This means investing in quality lighting pays dividends in your final product quality.
Selecting the Right Green Screen Material for Your Budget
Here’s where most people get stuck—they think they need to buy some fancy, professional-grade green screen backdrop that costs hundreds of dollars. Spoiler alert: you don’t. The market is flooded with budget-friendly options, and honestly, some of the cheapest materials work just as well as the expensive ones if you set up your lighting correctly. The key is understanding what you’re actually paying for when you buy different types of green screen backgrounds for video content. Let me break down your options from super budget to “I’m getting serious about this.”
- Fabric Backdrop Options: Cotton, muslin, and polyester fabrics are your most affordable choices, ranging from $20-60 for a decent-sized backdrop. The catch? They wrinkle easily and need to be stretched tight across a frame. For DIY setups, a simple PVC pipe frame works great and costs next to nothing. Make sure your fabric is matte (not shiny), as reflective surfaces cause lighting headaches.
- Seamless Paper Backdrops: You know those wide rolls of colored paper photographers use? They’re fantastic for green screen because they’re affordable (around $30-40 per roll) and eliminate wrinkles entirely. The downside is they’re not reusable—once you use it, it’s got wrinkles and marks. But for budget-conscious creators just starting out, the initial quality is excellent.
- Pop-Up and Collapsible Screens: These usually run $50-100 and are incredibly convenient for content creators who need portability. They fold up into a carry bag and set up in seconds. Perfect if you’re shooting in different locations or need to quickly transform your space back and forth between green screen mode and regular life.
- DIY Green Painted Wall: The ultimate budget hack—paint one wall of your space green. A gallon of green paint costs $20-30, and you’ve got a permanent green screen. The catch is you’re committed to that wall being green, and paint can be harder to get perfectly even than fabric, which matters for consistent chroma keying.
- Material Quality Matters More Than Price: The most important factor isn’t the cost but the consistency of the color and the matte finish. A cheap, wrinkled, or shiny green screen will cause you grief during editing. Invest in something you can stretch tight and maintain a consistent, flat matte green finish, even if it costs a bit more upfront.
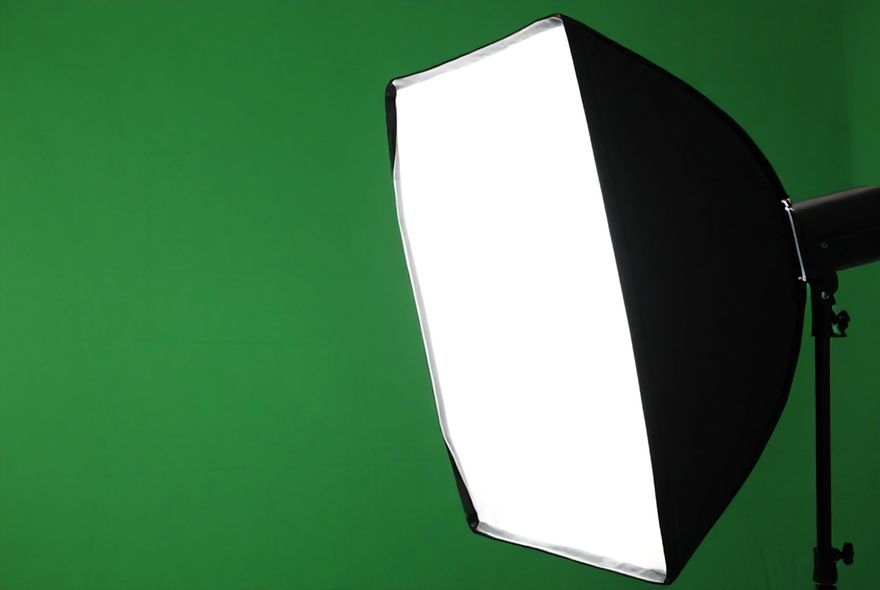
Mastering Lighting Tricks to Eliminate Shadows and Color Spill
Okay, this is where the magic happens. You can have the fanciest green screen background in the world, but without proper lighting, you’ll end up with shadows, color spill, and edges that look like they were cut out with a dull knife. Lighting isn’t just about making your subject visible—it’s about creating separation between your subject and your green screen, which is what makes the chroma key actually work smoothly in post-production. Think of it this way: shadows on your green screen are like dark spots on a white wall that you’re trying to paint over—they make the color inconsistent, and editing software gets confused. Here’s how to nail lighting without spending a fortune.
- The Three-Point Lighting Setup: This is your foundation for professional-looking video content. You need a key light (the main light hitting your subject), a fill light (to soften shadows), and a back light (to separate your subject from the green screen). You don’t need expensive studio lights—work lamps from hardware stores or even ring lights work surprisingly well. Position your key light to one side of your subject at about 45 degrees, the fill light on the opposite side to reduce harsh shadows, and the back light behind your subject pointing toward the screen.
- Eliminate Green Color Spill: This happens when light bounces off the green screen onto your subject, giving them a greenish tint. Combat this by positioning your subject at least 3-4 feet away from the green screen background. This distance is crucial—it lets the light hit your subject before it bounces back from the screen. Also, angle your lights so they’re hitting your subject more directly than the screen itself.
- Shadow Prevention Through Proper Distance: The closer your subject is to the green screen, the darker and more defined their shadow becomes. Push them away from the screen, and shadows become softer and less problematic for editing. If you’re working in a small space, even 2-3 feet makes a noticeable difference in shadow quality.
- Lighting Color Temperature Consistency: Make sure all your lights have the same color temperature (measured in Kelvin). Mixing warm and cool lights creates color inconsistencies that editing software struggles with. Ideally, use 5000-5600K lights, which is close to daylight and gives you natural-looking results.
- DIY Lighting Solutions on a Budget: LED work lights (around $20-40 each) are your budget-friendly heroes. They run cool, so you won’t turn your filming space into a sauna. Reflectors (or even white foam boards and bedsheets) bounce light to fill shadows. Per best practices in green screen setup, strategic use of reflectors can eliminate the need for expensive fill lights entirely.
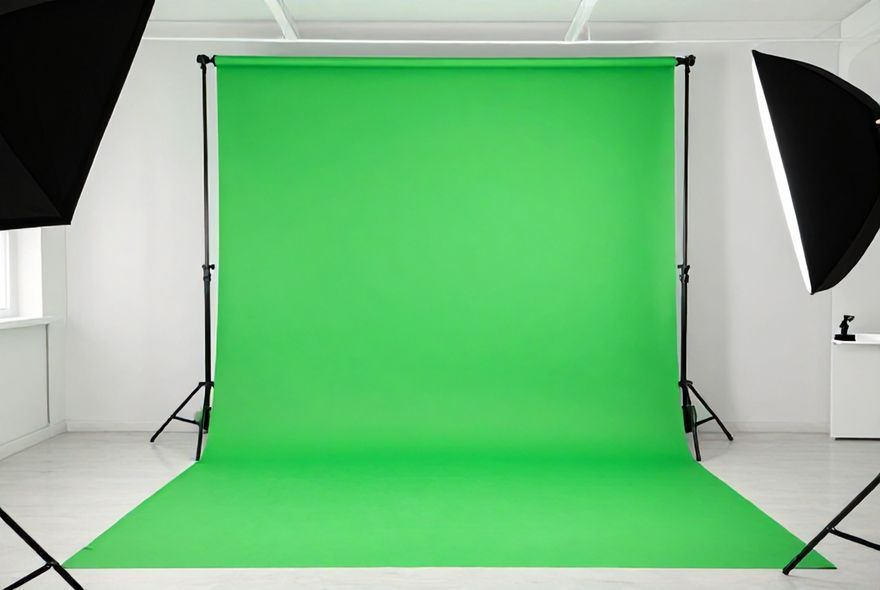
Building Your Green Screen Frame and Setup Structure
So you’ve got your green screen material picked out, but now you need something to hold it up and keep it wrinkle-free. The frame is basically the backbone of your entire setup, and the good news is you don’t need anything fancy. A sturdy frame keeps your backdrop taut and prevents those annoying wrinkles that mess with your chroma key. Whether you’re going full-on PVC pipe DIY or buying a professional stand, what matters is stability and adjustability. You want to be able to position your green screen background for video content at different heights and angles depending on your shot composition.
- PVC Pipe Frame (The Budget Champion): For under $50, you can build a frame using half-inch PVC pipes and connectors. A basic 8×10 frame is plenty for most content creators. Use clamps or zip ties to attach your fabric, and you’ve got a setup that rivals frames costing ten times more. The best part? It’s modular, so you can adjust the size for different projects.
- Professional Backdrop Stands: If DIY isn’t your thing, backdrop stands run $50-150 and include adjustable heights and crossbars. They’re convenient, portable, and require zero assembly knowledge. For content creators who plan to use green screen regularly, the convenience factor might justify the extra cost.
- Wrinkle Management Techniques: Even with a great frame, fabric wrinkles happen. Steam your backdrop before each shoot (a handheld steamer costs around $30), or hang it and let gravity do the work for a few hours. For seamless paper, just make sure it’s rolled smooth and clipped or taped securely to your frame.
- Space Optimization for Small Areas: If you’re working in a cramped room, consider a motorized backdrop system that rolls up and down. Or mount your screen to a wall and create a collapsible frame that you can fold away when not in use. Creativity in space management means you’re not forced to dedicate your entire room to green screen setup.
- Stability and Safety: Your frame needs to be stable enough that it won’t topple over during your shoot. Use sandbags or weighted bases if you’re concerned about stability. The last thing you want is your green screen crashing down mid-recording—not only does it ruin your shot, but it’s also a safety hazard.
Camera Positioning and Distance for Optimal Results
Where you place your camera and how far back you stand from your green screen backdrop matters more than you’d think. It affects everything from the apparent depth of your background to the consistency of your green screen background for video content. You want to position your camera in a way that captures your subject cleanly against the screen while maintaining enough distance to reduce those pesky shadows we talked about. Let’s talk about the practical positioning that’ll make your editing job way easier and your final product look genuinely professional.
- Subject Distance from Screen: Aim for at least 3-5 feet between your subject and the green screen background. This distance is your secret weapon for reducing shadows and color spill simultaneously. If you’re working in a super small space and can’t achieve this distance, even 2-3 feet is better than being right against the screen. The separation creates natural falloff of light and prevents that “pasted on” look in your final composite.
- Camera Positioning and Angles: Position your camera at eye level with your subject (or slightly above for flattering angles). Keep the camera pointed straight at the green screen backdrop—avoid sharp angles that make the screen appear distorted or that leave parts of the background inconsistently lit. A slight downward tilt works well for seated subjects, while standing subjects look best with a level camera position.
- Depth of Field Considerations: A shallow depth of field (blurry background) can actually help hide imperfections in your green screen. If you have a camera that allows manual focus control, use a slightly wider aperture (lower f-number) to blur out any wrinkles or inconsistencies in your backdrop. This is especially helpful if your green screen fabric isn’t perfectly even.
- Framing Within Your Shot: Leave headroom (space above your subject’s head) and avoid framing your subject right at the edge of the green screen. This gives your editing software clear green space to work with and prevents accidentally cutting off parts of your subject during the chroma key process. Generally, you want at least 12-18 inches of green screen visible on all sides of your subject.
- Testing Your Setup: Before you hit record on important content, do test shots. Review them on your computer and check for shadows, color spill, and uneven lighting on the green screen background. This preview step takes 10 minutes and saves you hours of re-shooting or fixing problems in post-production.
Post-Production Software and Chroma Key Techniques
You’ve built your setup, nailed your lighting, and filmed beautiful footage against your green screen background. Now comes the part where the magic actually happens—removing that green and replacing it with your chosen background. Post-production software has come a long way, and honestly, you don’t need professional-grade tools anymore. Whether you’re using free software or paid options, the principles of good chroma keying remain the same. The better your source footage (which depends on how well you followed all the previous steps), the easier and more professional your final result will be. Let’s dive into how to actually execute the chroma key.
- Free Software Options: DaVinci Resolve (free version), Shotcut, and OBS Studio all have solid chroma key capabilities. They might not have every fancy feature of premium software, but they’ll handle green screen background removal and replacement beautifully if your source footage is clean. The learning curve is steeper than paid options, but the cost savings are real.
- Paid Software Solutions: Adobe Premiere Pro, Final Cut Pro, and Sony Vegas offer more intuitive chroma key tools with better edge detection. If you’re creating video content regularly, the subscription cost (usually $10-50 per month) is worth the time you save. These tools often include automatic edge refinement and color correction features that handle tricky shots.
- Keying Process Fundamentals: Most software follows a similar process: select the chroma key tool, click on the green area you want to remove, and adjust sensitivity and softness settings. Start with lower sensitivity to avoid accidentally removing parts of your subject, then gradually increase it until all visible green is gone. It’s a balance between removing all the green and keeping your subject’s edges crisp.
- Handling Color Spill and Edge Issues: Even with perfect lighting, some green might reflect onto your subject’s edges. Use despill tools (available in most editing software) to neutralize this green tint. These tools specifically target green fringing around your subject and reduce it without affecting the rest of your footage. It’s one of the most powerful features for making your green screen composites look seamless.
- Background Selection and Layering: Once you’ve successfully keyed out the green, add your background layer beneath your subject footage. You can use stock video, still images, or even animated backgrounds depending on your software and creative vision. Make sure your background is properly scaled and positioned so it doesn’t look like your subject is floating in space. Slight motion in your background often looks more natural than a completely static backdrop.
Troubleshooting Common Green Screen Problems and Solutions
Here’s the thing about green screen setups—even when you do everything right, sometimes weird stuff happens. Maybe your software won’t key out all the green, or your subject’s edges look jagged, or there’s still visible green fringing even after despill. These are common problems, and the good news is they’re all fixable. Understanding what causes these issues helps you prevent them in future shoots, and knowing how to fix them means you won’t be pulling your hair out in post-production. Let me walk you through the most common headaches and how to solve them.
- Incomplete Green Removal: If your software isn’t removing all the green, the problem usually stems from inconsistent lighting on your green screen background. Dark spots or shadows on the screen won’t key out at the same sensitivity level as the rest of the screen. Solution: Re-light your screen more evenly, or adjust your keying sensitivity in smaller increments. Sometimes using multiple passes of the chroma key tool (set to lower sensitivity) works better than one aggressive pass.
- Jagged or Pixelated Edges: This typically means your camera resolution is too low or you’re using overly aggressive keying settings. It can also happen if your source footage is compressed heavily. Solution: Shoot in the highest quality your camera allows, and use feathering or edge softening tools in your editing software to smooth out rough edges. A slight blur on edges is more forgiving than sharp, jagged lines.
- Green Fringing or Color Spill: You did everything right with lighting, but you still see green around your subject’s edges. This is usually because your subject was too close to the screen or the despill settings aren’t quite right. Solution: Use despill tools to reduce the green cast, or use selective color correction to target just the green tones in your footage. In severe cases, rotoscoping (manually tracing around your subject) works as a last resort.
- Background Bleeding Through: Sometimes you see your background peeking through your subject’s semi-transparent areas (like hair). This happens when your keying sensitivity is too aggressive. Solution: Lower your key sensitivity slightly and use secondary color correction to refine just the problem areas. Hair especially needs careful handling—sometimes using a dedicated hair keying filter helps.
- Uneven Lighting on Your Green Screen Backdrop: If one side of your screen is brighter than the other, your keying will be uneven. Solution: Add fill lights or reflectors to balance the illumination. Move your lights around and check your screen through your camera to see the lighting distribution. It’s easier to fix this before you shoot than to fix it in post-production.
Pro Tips and Advanced Techniques for Professional Results
Once you’ve mastered the basics of creating a green screen background for video content, there’s a whole world of advanced techniques that can elevate your production quality even further. These aren’t necessarily complicated—they’re more about knowing the little tricks that professionals use to get that “wow factor” that makes viewers think you have a huge budget. Some of these techniques involve your camera settings, others involve creative use of your green screen setup itself, and a few are just about understanding how human perception works. Let’s get into the stuff that separates “pretty good” from “legitimately professional.”
- Parallax Scrolling and Moving Backgrounds: Static backgrounds work, but backgrounds with subtle movement look more dynamic and professional. If your background video has slight pans or depth changes, it creates parallax—the illusion that your subject is actually in that environment. This subtle effect massively increases the believability of your composite. Use stock video with natural movement or add subtle zoom-in effects to still images.
- Color Grading for Consistency: Your subject and your background need to feel like they exist in the same space. If your background is cool-toned and your subject is warm, it looks obviously composited. Use color grading to match the color temperature, saturation, and contrast between your subject footage and your background. This is where most amateurs lose believability, and it’s surprisingly easy to fix.
- Depth of Field Matching: Professional composites match the depth of field (blur) between subject and background. If your subject is sharp and in focus, your background should generally be slightly blurred (or match the same focus distance). Use blur filters on your background to match the apparent depth of field in your subject footage.
- Lighting Direction Matching: Pay attention to where the light is coming from in your background. If your subject is lit from the left but your background shows light coming from the right, it breaks the illusion. Adjust your lighting direction or rotate your background to match. This detail is subtle but critical for believability.
- Hair and Fur Keying Tricks: Hair is notoriously difficult to key cleanly. Use a dedicated hair keying filter if your software has one, or try the Refine Edge/Edge Detail tools available in professional software. For extreme cases, rotoscope just the hair area separately for perfect results. Some professionals even use a slightly different colored screen (like a lighter green) specifically for hair keying.
- Shoot Multiple Takes with Different Angles: This isn’t strictly about green screen technique, but shooting multiple angles of the same action gives you flexibility in editing. It also helps you catch mistakes or optimize lighting for different shots. If one take has better color consistency or lighting, you can use that version. Having options is always better than being stuck with one take.
Building a professional green screen studio doesn’t require a lottery win or a film degree. You now have the knowledge to create a setup that rivals studios costing ten times what you’ll spend, and you understand the principles that make green screen work—from selecting the right materials to mastering lighting tricks that eliminate shadows and color spill. Remember that understanding the fundamentals of green screen technology is your foundation for success. The investment you make upfront in proper lighting and setup planning saves you countless hours in post-production frustration.
Creating the perfect green screen setup for video content doesn’t need to break the bank or drive you up the wall. With some clever lighting tricks, you can eliminate pesky shadows and avoid the dreaded color spill that often plagues DIY video studios. Whether you’re working in a tight apartment or a sprawling home studio, embracing these techniques ensures your green screen blends seamlessly — and professionally — into your video production. By tackling the essentials of lighting, positioning, and background setup, you’ve got the blueprint to transform any space into a pro-level studio without hemorrhaging money.
Now, let’s get those creative juices flowing and that green screen glowing! Ready to become a video wizard? Grab your lightsabers—er, light kits—and start setting up your very own studio starring you and your vibrant green backdrop. Want more tips and tricks? Share your studio setup or epic green screen moments with us on Facebook, Instagram, and join our creative community. Happy filming!


Leave a Reply