
Ah, the infamous stick drift—any gamer’s worst nightmare. Got a controller doing the cha-cha all on its own? Our guide, “How To Fix Stick Drift On Your Gaming Controller,” is here to save the day. From nifty DIY methods to top-notch cleaning techniques, we’ll make sure your controller performs at its peak, just as it should. Ever had a showdown thwarted by a rogue joystick? Let’s fix that! Dive in as we explore everything from firmware updates to knowing when it’s time to say goodbye to that controller.

Key Takeaways
- Stop stick drift from crashing your game with simple cleaning hacks.
- Firmware updates might just be the save button you need—have you tried it?
- Discover when it’s time to say goodbye and replace your controller.
- DIY stick drift fixes: a gamer’s quick ticket back to the battlefield.
- Are dirty controllers ruining your K/D ratio? Here’s how to clean up your act.
- Bring your joystick back to life with our step-by-step guide to tackling stick drift.
- No tech manual needed—fix stick drift with stuff you’ve got at home.
Understanding Stick Drift: What’s Actually Happening Inside Your Controller
So, you’re in the middle of an intense gaming session—maybe you’re clutching that final round or navigating a tricky platformer—and suddenly your character starts drifting across the screen without you touching anything. Frustrating, right? That’s stick drift, and it’s become the bane of every gamer’s existence. But here’s the thing: understanding what’s actually happening inside your controller is the first step to fixing it. Stick drift occurs when the analog stick registers movement even when you’re not touching it, and it’s usually caused by wear and tear on the internal components. Let me break down exactly what’s going on in there.
- The Potentiometer Problem: Inside your controller’s analog stick, there’s a tiny component called a potentiometer that tracks the stick’s position. Over time, with thousands of hours of gaming, this component gets worn out. The internal contacts that measure stick position start to degrade, sending false signals to your console. It’s like a worn-out gear in a machine—eventually, it just stops working properly.
- Dust and Debris Buildup: Your gaming controller is basically a dust magnet. Every time you game, tiny particles from your hands, the air, and your environment seep into the crevices around the analog stick. This debris accumulates under the rubber membrane and interferes with the electrical contacts, causing the stick to register phantom inputs. Think of it like sand in a door hinge—it gums up the works.
- Moisture and Sweat Damage: Gaming gets intense, and sweaty hands are part of the territory. When moisture penetrates the controller’s casing and reaches the delicate circuitry around the analog stick, it can cause corrosion and short circuits. This creates intermittent stick drift that might come and go depending on humidity levels.
- Manufacturing Defects: Sometimes, stick drift isn’t your fault at all. Some controllers leave the factory with slightly misaligned components or subpar potentiometers. If your controller starts drifting within the first few weeks of use, you might be dealing with a manufacturing issue rather than wear and tear.
- Aggressive Gaming Habits: Let’s be real—some games require intense stick manipulation. Fighting games, competitive shooters, and action RPGs all demand rapid, aggressive stick movements. This constant friction accelerates wear on the internal components, shortening your controller’s lifespan significantly.
The Quick Cleaning Method: Your First Line of Defense
Before you panic and order a replacement controller, let’s try the simplest fix first. I’m talking about the cleaning method that works surprisingly well for mild to moderate stick drift. You don’t need any fancy tools or technical expertise—just some common household items and about ten minutes of your time. This approach addresses the dust and debris issue we talked about, and honestly, it solves the problem for a lot of people. Here’s what you need to know about tackling stick drift with a basic cleaning routine.
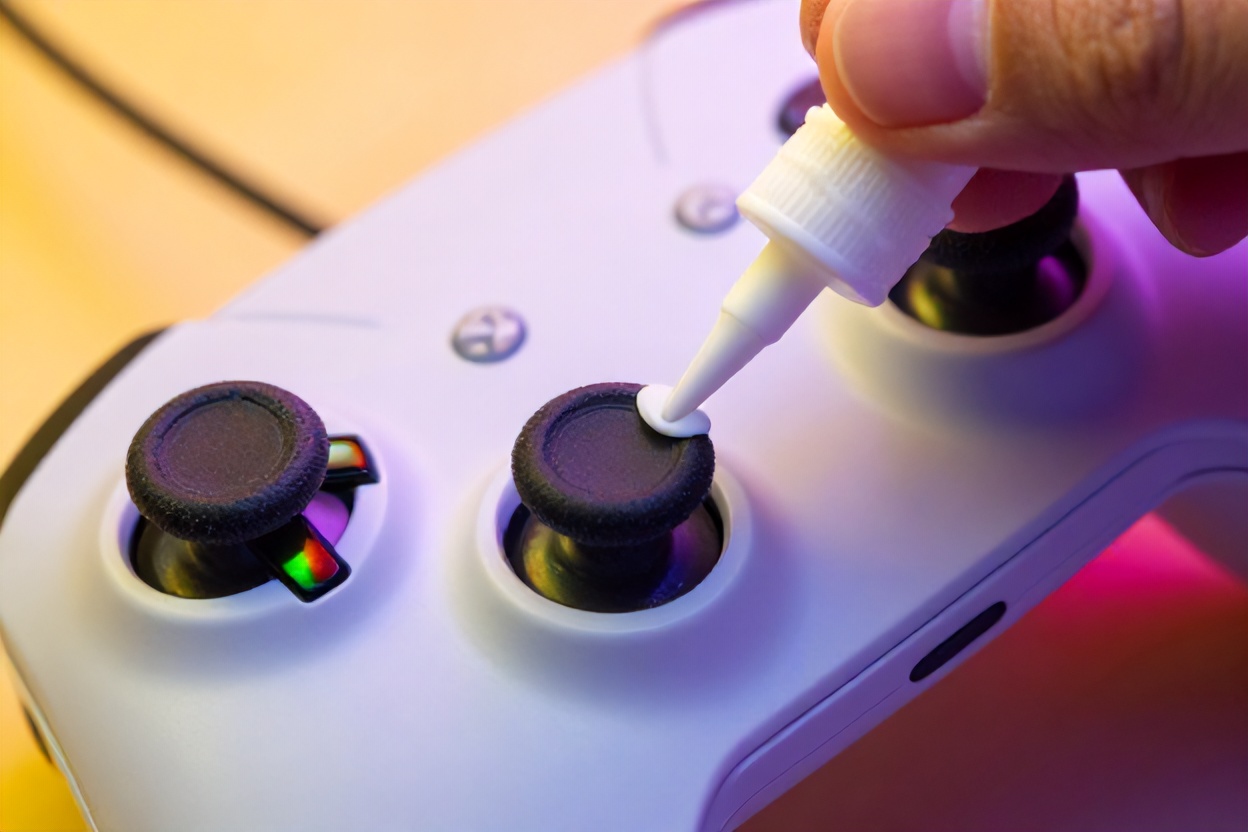
- The Isopropyl Alcohol Method: This is the gold standard for fixing stick drift without opening your controller. Grab a can of isopropyl alcohol (70-90% concentration works best) and a cotton swab. Gently insert the swab into the gap between the analog stick and the rubber casing, then rotate the stick around slowly while applying small amounts of alcohol. The alcohol dissolves dried residue and lubricates the internal contacts. Let it dry completely before testing. Most gamers report immediate improvement with this method, and it costs you about two dollars.
- The Compressed Air Technique: Sometimes, you just need to blow out the junk. Use a can of compressed air—the kind you’d use to clean a keyboard—and spray it around the analog stick from different angles. Hold the nozzle a few inches away to avoid damaging delicate components. This works especially well if you’ve been gaming in dusty environments or haven’t cleaned your controller in months.
- The Gentle Rotation Method: While applying isopropyl alcohol, slowly rotate the analog stick in full circles for about 30 seconds. This helps the alcohol penetrate deeper and clean the internal mechanisms. Don’t force it—you’re not trying to snap the stick off. Think of it as a gentle massage that helps distribute the cleaning solution where it needs to go.
- Preventive Cleaning Schedule: Here’s a pro tip: don’t wait until stick drift appears. Clean your controllers every few months if you’re a heavy gamer, or every six months if you’re more casual. This preventive approach can significantly extend your controller’s lifespan and keep stick drift from becoming a problem in the first place. It’s like brushing your teeth—easier than dealing with cavities.
- When to Know Cleaning Won’t Cut It: If you’ve tried the alcohol method multiple times and the drift persists or returns within days, you’re likely dealing with internal hardware degradation rather than just dirt. That means it’s time to move on to more advanced solutions, which we’ll cover next.
Advanced DIY Repairs: Getting Inside Your Controller
Alright, so the basic cleaning didn’t work, and you’re staring down the barrel of potentially expensive replacement costs. Before you surrender, there’s a middle ground: opening up your controller and tackling the problem directly. Now, I’m not gonna lie—this requires a bit more finesse than spraying some alcohol, but it’s totally doable if you’re willing to invest thirty minutes and follow instructions carefully. Opening your controller isn’t as intimidating as it sounds, and you might be surprised at how straightforward the process actually is. Let’s talk about what you’ll encounter inside and how to fix it properly.
- Getting Inside Without Breaking Anything: First things first—you’ll need a small screwdriver (usually a T9 or T10 Torx bit, depending on your controller model). Locate the screws on the back of your controller, typically hidden under warranty stickers. Once you remove these screws, the casing comes apart like a clamshell. Take photos as you disassemble—seriously, this saves you from head-scratching moments when reassembling. Keep those tiny screws in a safe place; losing one is peak frustration.
- The Replacement Potentiometer Route: If you’ve got the confidence and basic soldering skills, you can replace the worn potentiometer entirely. These components cost between five and fifteen dollars online, and replacement involves desoldering the old unit and soldering a new one in place. It’s not brain surgery, but it does require steady hands and a basic soldering iron. If you’ve never soldered before, this might be the moment to learn—there are tons of YouTube tutorials that walk you through it step by step. Successfully replacing the potentiometer permanently eliminates stick drift for that particular stick.
- The Potentiometer Cleaning Deep Dive: If soldering sounds like a bridge too far, you can still clean the potentiometer thoroughly once the controller is open. Use that isopropyl alcohol again, but this time you can directly access the component. Gently clean around the potentiometer and the contact points. Sometimes, removing built-up corrosion from the contacts alone fixes stick drift completely without requiring replacement.
- Cable Tension and Contact Points: While you’re inside, check that all internal cable connections are seated properly. Sometimes, a loose cable or poor contact can cause stick drift symptoms. Gently reseat any cables you find, ensuring they click into place. Also, inspect the metal contact points that connect the analog stick assembly to the circuit board. Clean them gently with a dry cotton swab if they look corroded.
- The Crucial Reassembly Step: This is where patience pays off. When putting your controller back together, make sure all components are aligned properly before screwing it shut. Check that the analog stick moves freely and the buttons feel right before you commit to that final screw. Test it on your console before you declare victory. There’s nothing worse than thinking you’ve fixed stick drift, only to discover you’ve introduced a new problem during reassembly.
Firmware Updates and Software Solutions: Don’t Overlook the Easy Stuff
Here’s something a lot of gamers overlook when dealing with stick drift: sometimes, the problem isn’t hardware at all—it’s software. Your controller’s firmware (the built-in code that tells it how to behave) can occasionally become corrupted or outdated, causing stick drift symptoms even though your hardware is perfectly fine. Before you start taking screwdrivers to your controller or ordering replacement parts, let’s make sure your controller’s software isn’t the culprit. This is the kind of fix that takes five minutes and costs absolutely nothing, which makes it worth doing first.
- Console-Specific Firmware Updates: Both PlayStation and Xbox regularly release controller firmware updates that can address stick drift issues. On PlayStation, you can update your controller through the Settings menu—just connect your controller via USB and check for updates. Xbox has a similar process through the Xbox Accessories app on your console or PC. These updates often include calibration adjustments that can eliminate phantom stick movements caused by software glitches rather than hardware wear.
- Recalibration Tools and Utilities: Your console has built-in controller calibration tools that can reset how your controller interprets stick input. On PlayStation, this is under Settings > Devices > Controllers. On Xbox, it’s in the Xbox Accessories app. Running a full calibration sometimes clears up stick drift that’s caused by incorrect sensor readings. It’s like rebooting your controller’s brain—quick, harmless, and occasionally miraculous.
- Deadzones and Sensitivity Adjustments: Many modern games let you adjust the controller’s deadzone—the area where stick input is ignored to prevent drift. If your game supports this feature, try increasing the deadzone slightly. This won’t fix the underlying problem, but it can make stick drift much less noticeable while you’re figuring out a permanent solution. Some competitive players actually prefer larger deadzones anyway, so this might be a win-win.
- Game-Specific Settings Versus System Settings: Sometimes, stick drift appears in one game but not others. This usually indicates a software compatibility issue rather than hardware failure. Check your game’s controller settings and try adjusting sensitivity or input response. If the drift disappears in other games, the issue might be specific to that title’s code, not your controller itself.
- When Software Definitely Isn’t the Issue: If your stick drifts in multiple games, persists after firmware updates and recalibration, and happens whether your controller is connected via USB or wireless, you’re definitely looking at a hardware problem. At that point, stop troubleshooting the software and move on to physical repairs or replacement.
Temporary Workarounds: Keep Gaming While You Fix the Problem
Sometimes, stick drift catches you at the worst possible time—maybe you’ve got gaming plans with friends, or you’re in the middle of a crucial campaign. You need solutions that work right now, not solutions that require ordering parts or waiting for repairs. That’s where temporary workarounds come in. These aren’t permanent fixes, but they can get you back in the game quickly while you pursue a more lasting solution. Think of them as the gaming equivalent of a band-aid—not ideal long-term, but definitely useful in a pinch.
- The Second Controller Strategy: If you’ve got another controller lying around, this is obvious but worth stating: use it. Rotate between controllers to distribute wear and give your drifting controller a break. If you’re a competitive player, having a backup controller isn’t just about fixing stick drift—it’s smart strategy anyway. Most serious gamers keep at least two controllers ready to go.
- Adjusting Game Settings on the Fly: As we mentioned before, increasing deadzone settings within games can make stick drift almost imperceptible. Some games let you adjust this mid-game through the settings menu. It’s not perfect, but it can make an unplayable situation manageable until you get your controller sorted. This works especially well for slower-paced games where precise stick input is less critical.
- Switching to Controller Alternatives: Depending on your gaming setup, you might have options. Using a fight stick for fighting games, a racing wheel for driving games, or a keyboard and mouse for shooters can work around stick drift entirely. It’s not a long-term solution for general gaming, but it’s perfect for getting through specific games while your main controller is in the shop.
- The Tape Method (Proceed with Caution): Some desperate gamers wrap a small piece of tape around the base of the analog stick to increase friction and reduce unwanted movement. Does it work? Sometimes. Is it a great solution? Not really—it can damage your stick and make normal gameplay feel weird. I’d avoid this one unless you’re truly desperate, and even then, it’s a last resort before replacement.
- Setting Realistic Expectations: Be honest with yourself about what games you can and can’t play with stick drift. Competitive shooters, fighting games, and precision platformers are basically unplayable with moderate to severe drift. Story-driven games, turn-based RPGs, and less demanding titles might still be manageable. Work with what you’ve got while you’re pursuing a real fix.
When to Give Up and Replace Your Controller
Look, sometimes you’ve done everything right and the stick drift just won’t quit. You’ve cleaned, you’ve updated firmware, you’ve even cracked open the controller and tried replacing components. But the drift persists, mocking you like an unwanted houseguest who refuses to leave. At some point, holding onto a broken controller becomes false economy. You’re spending time troubleshooting what should be a recreational activity, and that defeats the purpose of gaming entirely. Let’s talk about recognizing when it’s time to cut your losses and invest in a replacement. This isn’t failure—it’s pragmatism.
- The Severity and Persistence Test: If stick drift is so bad that you can’t play your games without constant compensation, and it returns within days of every fix attempt, you’ve got a serious hardware problem. Some controllers just reach end-of-life, and that’s okay. They’ve served you well—time to let them retire gracefully. If you’re spending more time fighting stick drift than actually playing games, replacement is the sensible choice.
- Calculating the Cost-Benefit: A replacement controller typically costs between fifty and seventy dollars, depending on your platform. If you’ve already spent money on tools, replacement parts, and hours of your time troubleshooting, you might be approaching that replacement cost anyway. Plus, your time has value. Sometimes paying for a new controller is cheaper than the value of the time you’re spending on repairs.
- Warranty Coverage and Replacements: If your controller is still under warranty, absolutely take advantage of it. Most manufacturers offer one-year warranties that cover stick drift. You might not even need to pay for a replacement—the company will send you a new one. Check your purchase receipt and reach out to customer service. It’s literally designed for situations exactly like this.
- Buying Smart for Your Next Controller: When you do replace your controller, think about preventing future stick drift. Store your controller in a clean, dry place. Avoid eating or drinking while gaming. Take breaks to let your hands cool down. Some controllers are known for durability issues while others have better track records—do your research before buying. A slightly more expensive controller with better reputation for longevity might be worth the extra investment.
- Proper Disposal and Recycling: Don’t just toss your old controller in the trash. Electronics contain materials that shouldn’t end up in landfills. Most retailers that sell controllers will take old ones for recycling. Some manufacturers have take-back programs. Doing this right feels good and helps the environment.
Prevention Strategies: Never Deal with Stick Drift Again
The best fix for stick drift is never getting it in the first place. I know that sounds obvious, but seriously—prevention is criminally underrated. Once you’ve dealt with stick drift once, you never want to do it again. The good news? You’ve got way more control over this than you might think. Your gaming habits, how you store your controller, and basic maintenance can add months or even years to your controller’s lifespan. Let me share the prevention strategies that actually work, based on what causes stick drift in the first place.
- Cleaning Becomes a Regular Habit: Remember that dust and debris are major culprits in stick drift. Make controller cleaning part of your regular gaming routine—maybe once a month if you game heavily, or every couple of months if you’re more casual. A quick once-over with a dry cloth and occasional isopropyl alcohol treatment can prevent the buildup that leads to drift. It takes five minutes and costs nothing. Think of it like maintaining your gaming setup.
- Control Your Environment: Gaming in a dusty room? That’s asking for trouble. Smoking near your gaming setup? The residue gets into everything. Pet hair everywhere? Yeah, that ends up in your controller too. Keep your gaming area reasonably clean, and your controllers will thank you. If you can’t control your environment perfectly, at least keep your controller in a protective case when you’re not using it.
- Manage Moisture and Sweat: After intense gaming sessions, especially in summer or if you game in a warm room, your controller might be damp from sweat. Let it air dry completely before storing it. Some gamers keep a small towel nearby to wipe their hands during sessions. If you tend to have very sweaty hands, this single habit can dramatically extend your controller’s lifespan.
- Gentle Gaming Habits: Okay, I’m not saying you can’t play competitive shooters or fighting games—that’d be ridiculous. But being intentional about how hard you grip your controller and how aggressively you move the sticks can help. Avoid white-knuckling the controller or making unnecessarily large stick movements. Your performance won’t suffer, but your controller’s longevity will improve.
- The Backup Controller Philosophy: Serious gamers have multiple controllers anyway. Rotating between them distributes wear and extends the life of each controller. Plus, you’re never stuck without a working controller. This is especially smart if you’ve got friends coming over for multiplayer sessions—you’ll always have backup options available.
Troubleshooting Stick Drift: A Decision Tree for Your Situation
You’ve read through all the options, and now you’re probably wondering: “Okay, but which one should I actually do?” The answer depends on your specific situation—how bad the drift is, how comfortable you are with DIY repairs, and how much you’re willing to spend. Let me walk you through a practical decision-making process that’ll help you figure out your best path forward. Think of this as a roadmap that accounts for different scenarios and different comfort levels.
- Is Your Controller Brand New or Under Warranty? If you bought it recently and it’s drifting, contact the manufacturer immediately. This is covered under warranty, and you’ll get a replacement for free. Don’t waste time troubleshooting—just initiate the warranty claim. This is literally what warranties exist for, so take advantage of it.
- Start with the Simplest Solutions First: Always begin with isopropyl alcohol cleaning and a firmware update. These cost almost nothing, take minimal time, and work surprisingly often. Only move to more complex solutions if these don’t help. There’s no reason to open your controller or spend money on replacement parts if a basic cleaning solves the problem.
- Assess Your Comfort Level with DIY Repairs: If the simple fixes didn’t work, ask yourself honestly: am I comfortable opening my controller and potentially soldering components? If yes, the DIY repair route might save you money. If no, you’re probably looking at replacement. There’s no shame in that—some people aren’t comfortable with electronics repair, and that’s perfectly fine.
- Consider the Time Investment: How much time are you willing to spend troubleshooting? If you’ve already spent an hour on this and stick drift persists, replacement might be the smarter choice. Your gaming time is valuable, and spending it on repairs instead of actually playing games is counterproductive. At some point, pragmatism trumps stubbornness.
- Make a Financial Decision: Add up what you’ve spent on tools, replacement parts, and time. If you’re approaching the cost of a new controller anyway, just buy the new one. You’ll get a controller that works perfectly, you’ll have peace of mind, and you won’t have the nagging doubt that your DIY repair might fail next week. Sometimes the expensive option is actually the smart option.
Looking Forward: Future-Proofing Your Gaming Setup
We’ve covered how to fix stick drift and how to prevent it, but let’s zoom out for a second and think bigger picture. The gaming industry knows about stick drift—they’ve known for years. And slowly, things are changing. Manufacturers are investing in better analog stick technology, and some newer controllers are significantly more durable than their predecessors. Understanding these trends can help you make smarter purchasing decisions going forward. You’re not just fixing a problem today; you’re setting yourself up for a better gaming experience tomorrow.
- Advances in Analog Stick Technology: Newer controllers are starting to use improved potentiometers and different contact materials that resist wear better than older designs. Some manufacturers are experimenting with magnetic analog sticks that don’t have the same wear issues. When you’re shopping for a replacement controller, looking for these improved designs can mean fewer stick drift headaches down the road. It’s worth researching what’s available in your price range.
- Alternative Input Methods Gaining Ground: The gaming industry is slowly exploring alternatives to traditional analog sticks. Some controllers now feature different stick designs, and some games are becoming more adaptable to different input methods. As these alternatives improve, you’ll have more options if stick drift becomes a recurring problem with traditional controllers.
- Manufacturer Accountability: Consumer complaints about stick drift have gotten loud enough that manufacturers are paying attention. Some are offering extended warranties specifically for stick drift issues. When you’re choosing your next controller, factor in warranty coverage and the manufacturer’s track record with durability. Vote with your wallet—support companies that stand behind their products.
- Building Your Gaming Infrastructure:**strong> Instead of relying on a single controller, think about building a small collection. Different controllers for different games, backup controllers for emergencies, and specialized controllers for specific genres. This distributes wear and ensures you always have a working option. It’s an investment that pays dividends in uninterrupted gaming fun.
- Stay Informed About Your Equipment: Follow gaming communities and tech forums where people discuss controller reliability. Learn which models have better longevity and which ones are notorious for stick drift. This collective knowledge is incredibly valuable when you’re making purchasing decisions. The gaming community shares this information freely—take advantage of it.
In the epic battle against the infamous stick drift on your gaming controller, you’re now armed with a toolkit of DIY solutions ranging from the simplest cleaning techniques to sophisticated firmware updates. First, always start with a good cleaning; dust and debris are often the culprits behind the drifting madness. If that doesn’t work, consider updating your controller’s software – manufacturers often release fixes to optimize performance. Should all else fail and your gaming sessions remain plagued by unwanted movement, it might be time to consider upgrading to a new controller. Remember, maintaining peak performance means knowing when to call it quits with hardware that just won’t cooperate. Being proactive can save your gaming experiences from grinding to a frustrating halt.
Now that you’re a stick drift-fighting pro, ready to bring your controller back from the abyss, why not share your newfound wisdom with the world? Head over to our pages on Facebook, Instagram, and Pinterest for more game-saving tips and to show off your now fully operational controllers in action. Who knew being a gaming superhero was this easy? See you there!


Leave a Reply